- 26 Jun 2023
- 7 Minutes To Read
- Print
- DarkLight
- PDF
Automated Email Notifications
- Updated On 26 Jun 2023
- 7 Minutes To Read
- Print
- DarkLight
- PDF
This page describes how to manage automated email notifications. For more information about email notifications in general, see Notifications Overview.
Automated email notifications allow you to send emails when certain events occur and only when a set of conditions are met.
These kinds of notifications can be used in multiple scenarios, such as:
- Keeping clients informed during longer processes such as tracking a loan from application to disbursement.
- To issue reminders if a repayment is coming up or past due.
- To inform users about client activity.
To send your individual clients, groups, or credit officers emails, you must first create the email notification template and the receiver must subscribe to the notification.
To create automated email notification templates, you must have an email server already set up, for more information, see Email Server Setup and you must have either the CREATE_COMMUNICATION_TEMPLATES or EDIT_COMMUNICATION_TEMPLATES permissions.
Creating automated email notification templates
To create automated email notification templates:
- On the main menu, go to Administration > Email > Notifications.
- Select Add Notification.
- Enter all the necessary information. More information on fields below.
- Select Save Changes.
Once an email notification template has been created, it is added to the list of templates. The list indicates the state and status of the templates.
If a template state is In Use it means that at least one notification has been sent using that template, whereas if it's Not In Use the template hasn't been used for any notifications yet.
If a template status is Active it's available and can be used, whereas if it is Inactive it is currently deactivated and can't be used to send notifications.

Fields for automated email notification templates
The following is the list of fields available when creating an email notification template.
Once you have created a notification template you may only edit the name, conditions, and contents. You cannot edit the subscription option settings, target, recipient, and event trigger. See below for more details on each field.

Name
The email template name must be unique and must be a maximum of 255 characters long.
Subscription option settings
In order for an individual client, group, or credit officer to receive an email notification, they must be subscribed to it. There are two subscription option settings you may choose from - opt-out and opt-in.
The Opt-out option means that an individual client, group, or credit officer will be automatically subscribed to the notification. You may choose to unsubscribe the potential recipient by editing their notification request settings.
The Opt-In option means that an individual client, group, or credit officer will not be automatically subscribed to the notification. If you want to subscribe them to the notification, you must explicitly select the notification in their notification request settings.
For more information, see Subscribing or unsubscribing a recipient from an email notification.
Target
The target indicates what kind of entity will be monitored to trigger the notification. The options available for email notifications are Clients or Groups.
The target type you choose will determine the available recipient types, placeholders, and event triggers for the notification.
Recipient
Once you select a target, you are able to select the potential recipient for the notification. You may only select one recipient type. The list of available recipients will depend on the target type. For more info, see Target.
If you select the Clients target type then by default, you may only select the potential recipients to be clients or credit officers.
If you select the Groups target type then by default, you may only select the potential recipients to be credit officers or members of a group with a specific group role name.
A group role name represents a certain type of member in a group, for example: CEO, secretary, or treasurer. For more information, see Group Role Names.
You may also create user link custom field definitions that will allow you to select other users as the recipients of an automated email notification relating to an individual client or group. For more information, see User Link Custom Field Showcase.
The notification will only appear in the notification request settings for the recipient type chosen and you will be able to subscribe or unsubscribe accounts of that recipient type to the notification. For more information, see Subscribing or unsubscribing a recipient from an email notification.
Event trigger
The On Event dropdown allows you to select the event type that will trigger a notification to be sent. The available events will depend on the target and recipient you have selected for the notification.
Depending on the event selected you may have the option to set up more conditions.
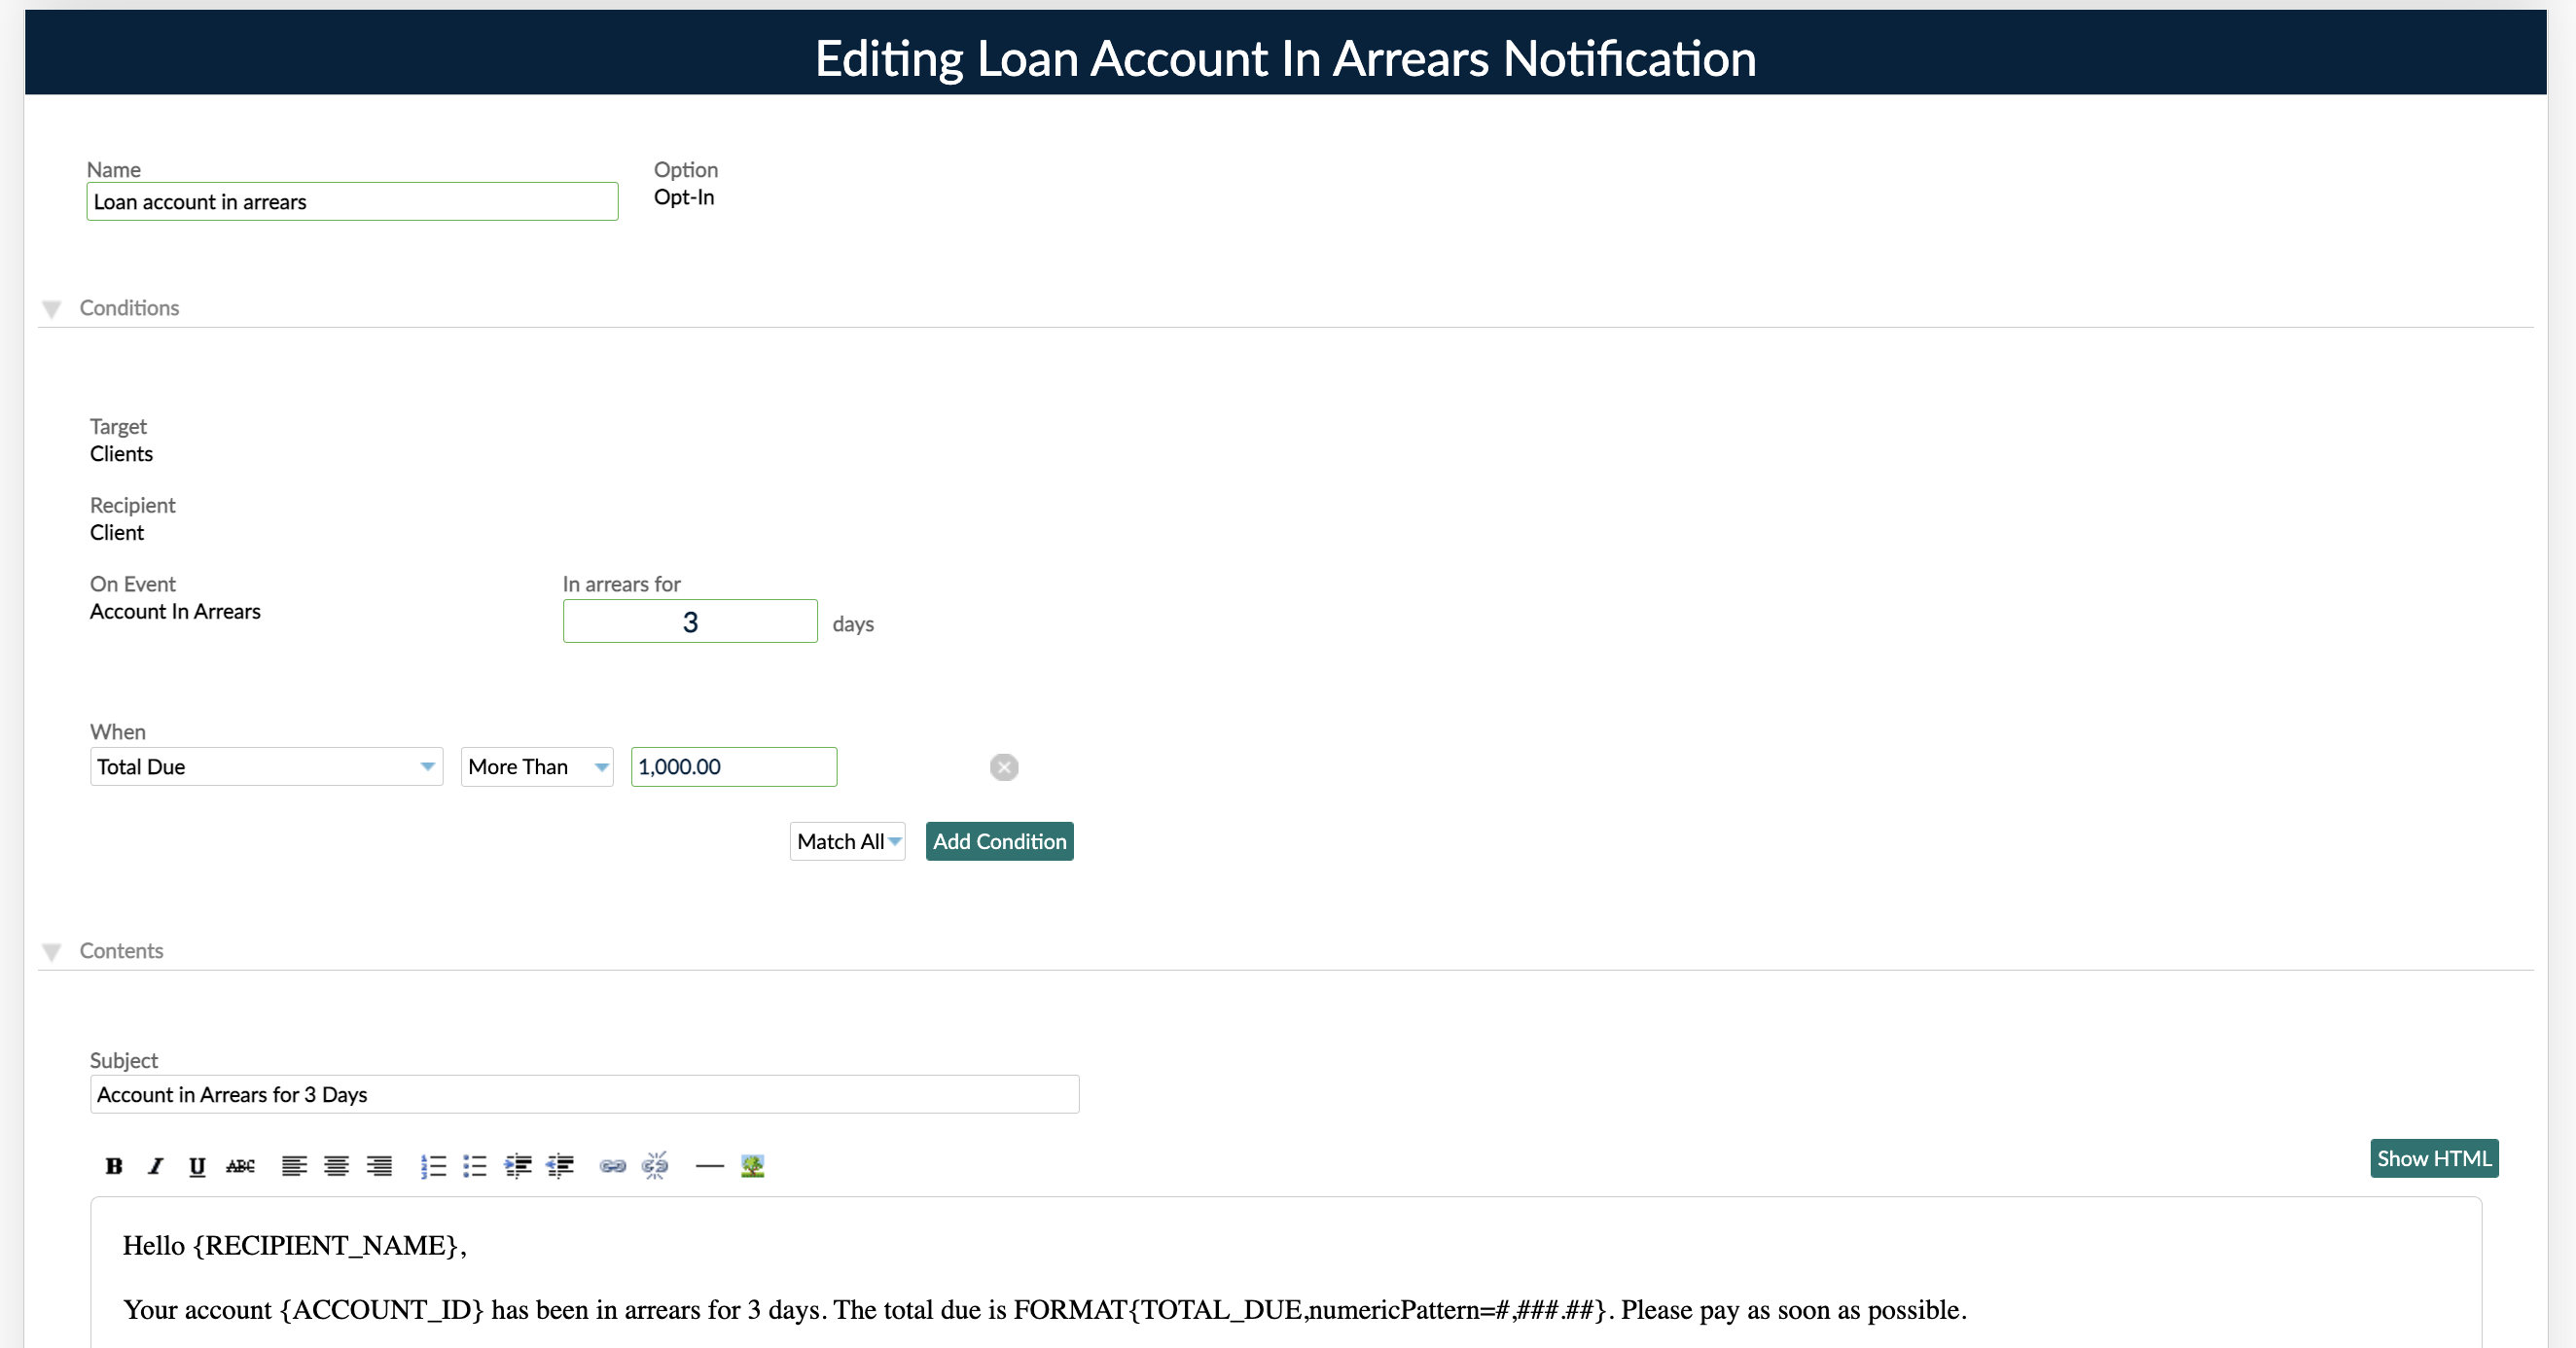
For example, if you choose the Account in Arrears event, then you may also select how many days the account must be in arrears for a notification to be sent as well and you may also add more conditions. For more information on the available events, see Event Triggers for Notifications.
Conditions
You may create more conditions that need to be met in order for a notification to be sent.
Most conditions are made up of a field or piece of information that is monitored, an operator, and a value.
To set up a condition:
- Select the field or piece of information to monitor. The available options will depend on the target, recipient, and event trigger selected.
- Select the operator. The available options will depend on the option you selected in step 1.
- If appropriate enter the values.
To remove conditions, select the Delete icon .
To create more conditions, select Add Condition.
In the dropdown, selecting Match All sends a notification if all the conditions are met. Selecting Match Any sends a notification if at least one of the conditions is met.
For example, you may want to send an individual client an email when an account is in arrears but only if the total due is more than USD1000.

Sending notifications in different languages
To prepare emails for recipients that use specific languages, you may set conditions using the Preferred Language field.

Contents
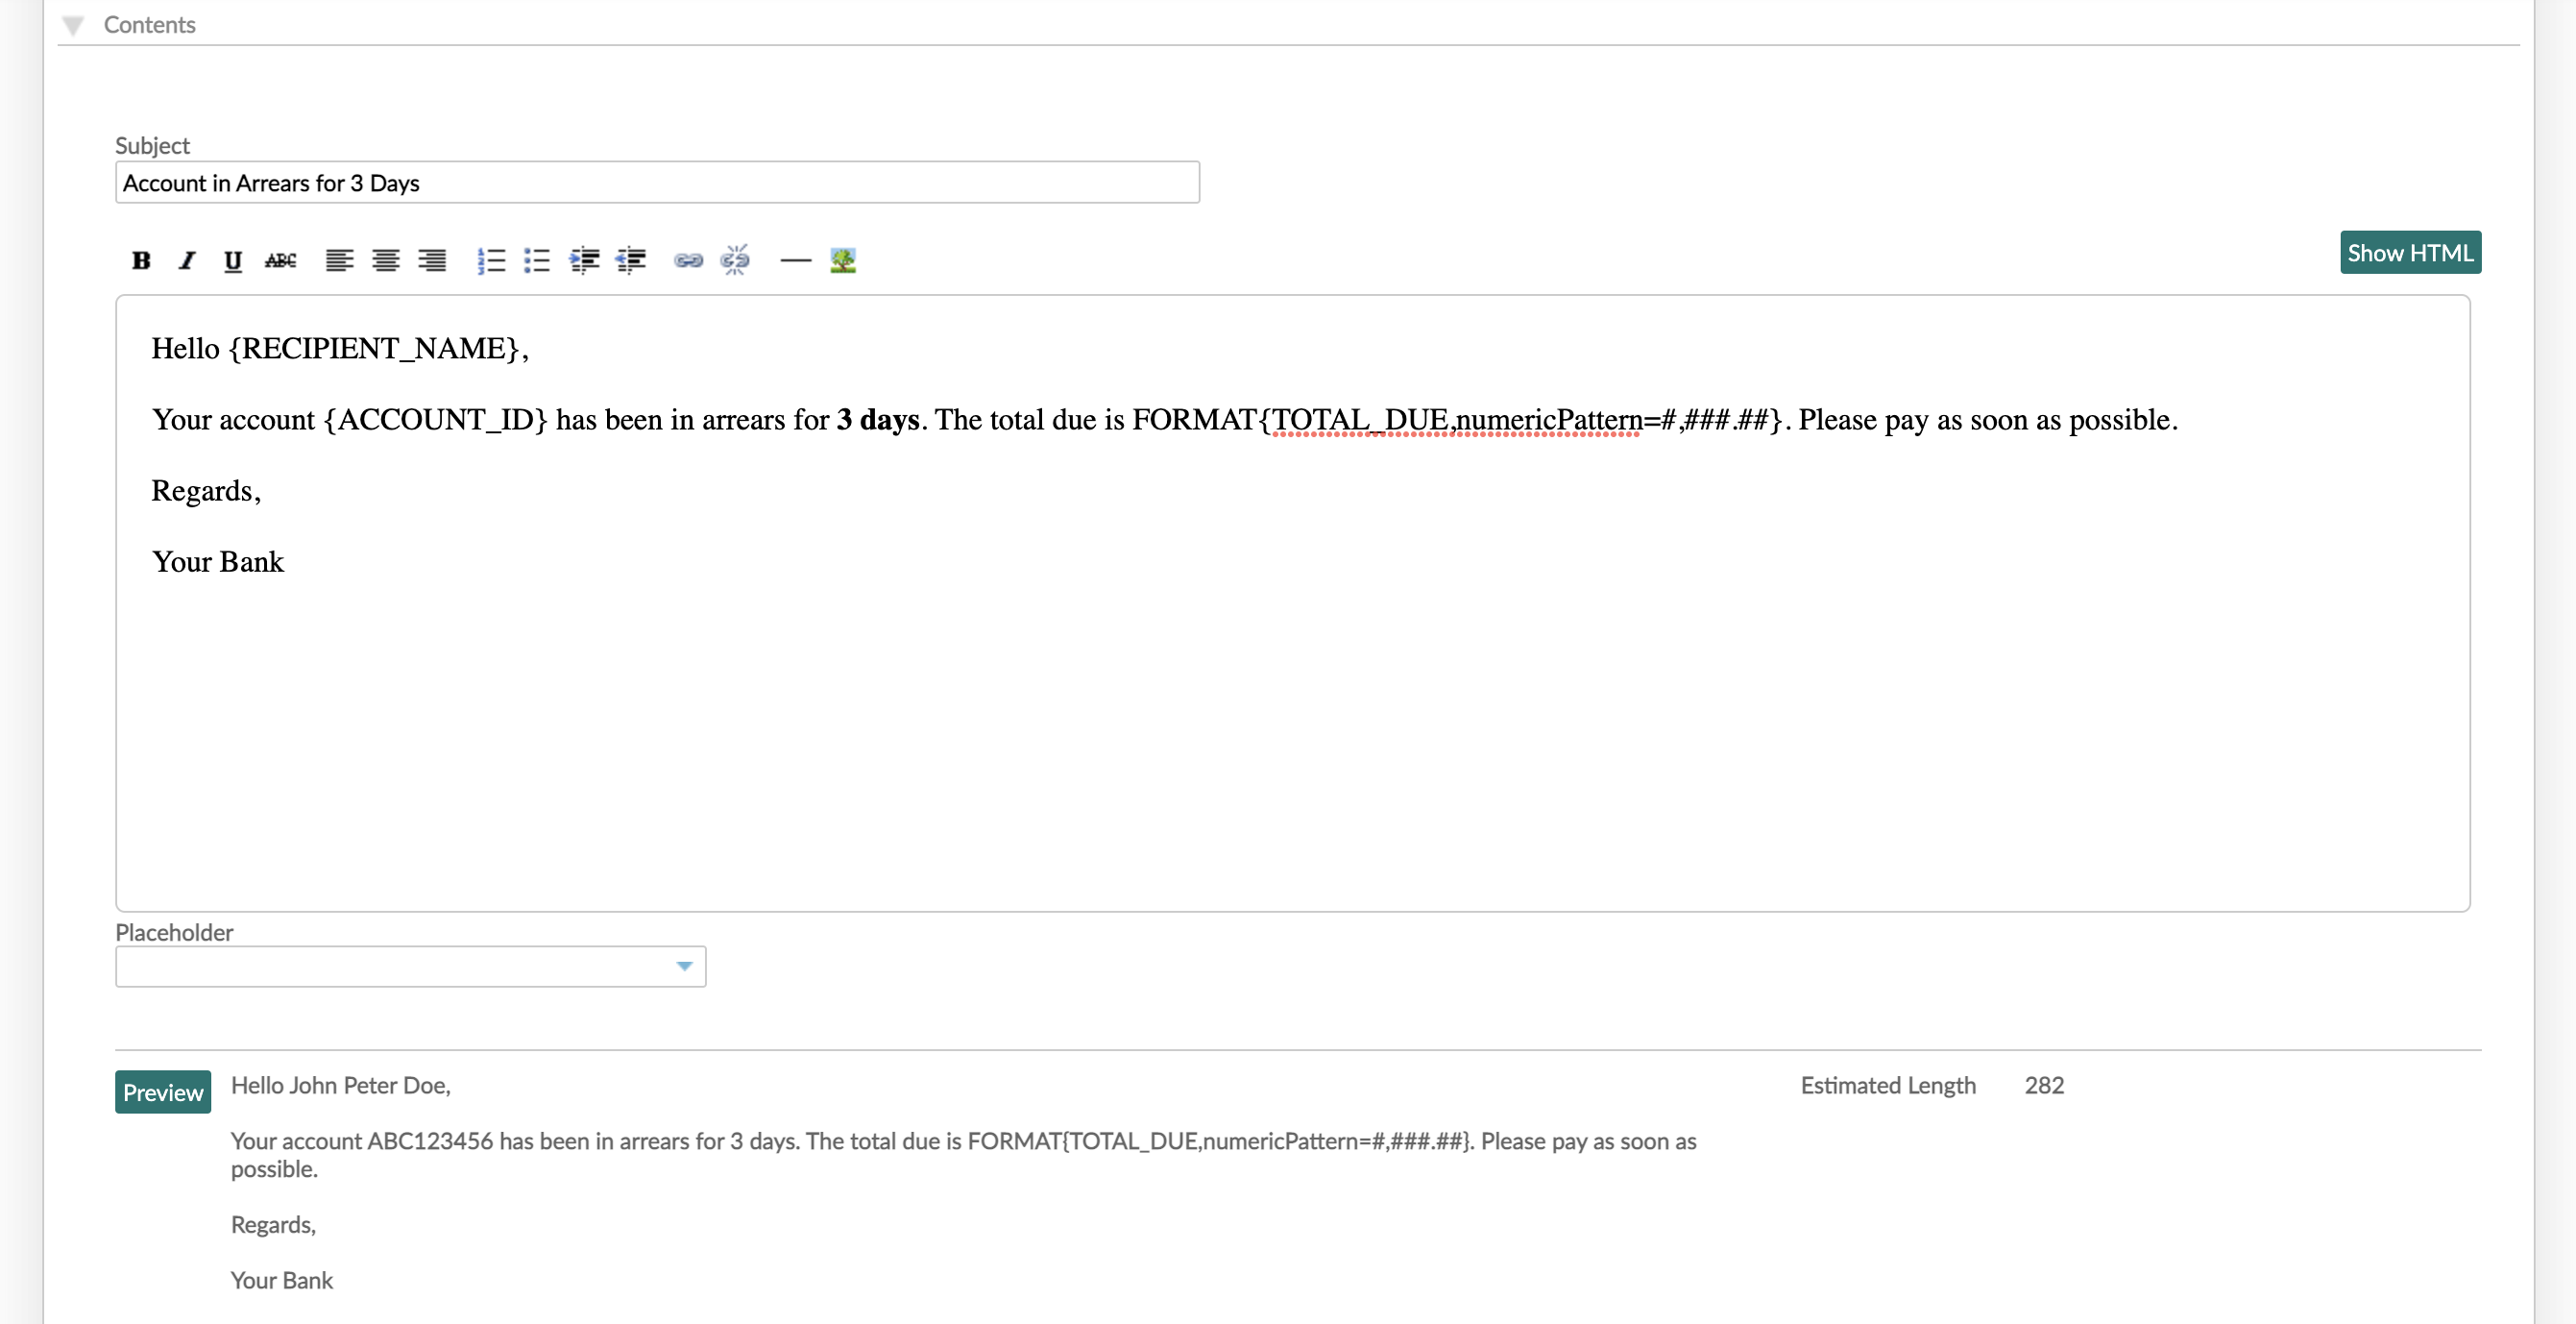
The email contents consist of the subject line and the main body of the email.
The subject line may include text and placeholders while the body may include text, images, links, and placeholders. We recommend a maximum subject line length of around 50 characters.
Placeholders allow you to include relevant information for each individual recipient of a notification. For more information, see Placeholders.
You edit the body of the email using a rich text editor and an HTML editor. For more information on how to use each editor to customize your emails, see Content Editors.

Subscribing or unsubscribing a recipient from an email notification
You can edit the email notifications that your individual clients, groups, or credit officers are subscribed to.
Depending on the subscription option setting of a notification, a recipient may or may not be automatically subscribed to a notification when it is created. For more information, see Subscription option settings.
To edit which notifications a recipient is subscribed to:
- Go to the profile of the recipient. For example, go to the individual client account page.
- In the top right-hand corner select More > Set Notifications.
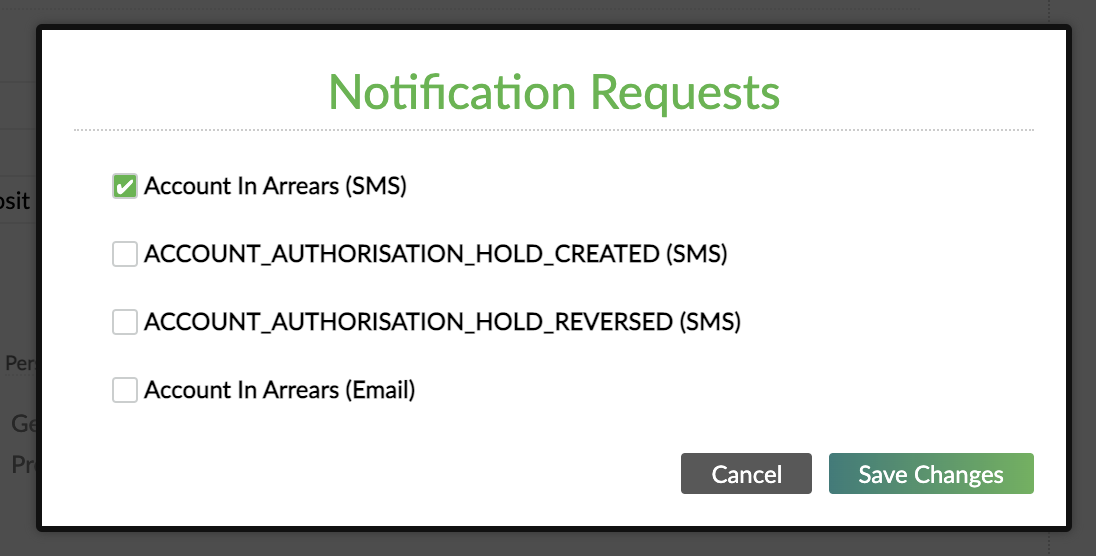
- In the Notification Requests dialog, select the notifications that you would like the recipient to be subscribed to.
- Select Save Changes.
The Notification Requests dialog will only display notifications that have been created for a specific recipient type. For example if you are looking at the notification requests settings of a client, only the notifications that have been created for recipients that are clients will be visible. For more information, see Recipient.
The notifications in the Notification Requests dialog are listed by the name of the event trigger and in parentheses they list whether they are SMS, email, or webhook notifications.

Send out time
Email notifications are dispatched between 09:00 and 18:00 according to the timezone set on your Mambu tenant.
We recommend including a timestamp in message templates because recipients may receive a message with information that does not take into account actions that have been taken outside of working hours. This is because some notifications may be created automatically during midnight processing but only be sent out during working hours.
For example, if a client makes a repayment at 07:00 AM, they may still receive a notification reminding them about an upcoming repayment that is no longer applicable to them.
Managing email notifications
Deactivating and reactivating notifications
Notification templates can be deactivated and reactivated at any time. When a notification is deactivated it will stop being sent to any recipients.
To deactivate or reactivate a notification, go to Administration > Templates > Actions and then select either Deactivate or Reactivate.


